Start the service manager
Click configure IE ESC under the Server Summary section
Disable the feauture for administrators and/or users
Start the service manager
Click configure IE ESC under the Server Summary section
Disable the feauture for administrators and/or users
Document ID: 2007071909500548
What should I think about in advance before I begin migrating my Symantec AntiVirus environment to Symantec Endpoint Protection?
Consider several factors before you begin your migration:
Before you begin migration, you must read the migration chapters in the Installation Guide for Symantec Endpoint Protection and Symantec Network Access Control.
What are the general steps to migrating Symantec AntiVirus to Symantec Endpoint Protection?
You must complete the following steps to migrate Symantec AntiVirus to Symantec Endpoint Protection in the order listed:
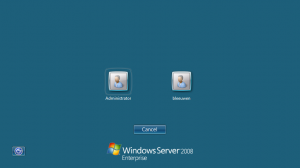
After installing windows server 2008, you can choose the user with whom you want to logon (see the picture below).

Offcourse this is not desirable for many company’s and you should turn this off. Take the following steps to do this on a stand alone server:
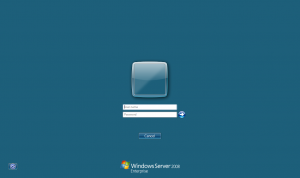
When logging off and pressing CTL+ALT+DEL you need to type in your username and password like the screen below:

Performance problems can arise in any computing environment. Complex application behaviors, changing demands, and shared infrastructure can lead to problems arising in previously stable environments. Troubleshooting performance problems requires an understanding of the interactions between the software and hardware components of a computing environment. Moving to a virtualized computing environment adds new software layers and new types of interactions that must be considered when troubleshooting performance problems.
The attached document is the first installment in a guide covering performance troubleshooting in a vSphere environment. It uses a guided approach to lead the reader through the observable manifestations of complex hardware/software interactions in order to identify specific performance problems. For each problem covered, it includes a discussion of the possible root-causes and solutions. Topics covered include performance problems arising from issues in the CPU, memory, storage, and network subsystems, as well as in the VM and ESX host configuration. Guidance is given on relevant performance metrics to observe using the vSphere Client and esxtop in order to isolate specific performance issues.
This first installment of Performance Troubleshooting for VMware vSphere 4 covers performance troubleshooting on a single VMware ESX 4.0 host. It focuses on the most common performance problems which affect an ESX host. Future updates will add more detailed performance information, including troubleshooting information for more advanced problems and multi-host vSphere deployments.
To create a user account for a server group
Document ID: 2005041217010148
About the server group password
The “Remember this user name and password for me” check box saves a password so that you do not have to enter it the next time the server group is opened. Also, if you “Automatically unlock this Server Group when I start the Symantec System Center,” the password is saved in a secured cache.
To no longer save the server group password
The server group is now configured to prompt for a password, and the server group will not be unlocked automatically when you start Symantec System Center.
Reset the Symantec System Center admin user password
You can use the Password Reset Utility to reset any user’s password. You must have Administrator access to the primary server of the server group.
To reset the Symantec System Center admin user password
For information about creating and managing user accounts in Symantec System Center, see the document Using Symantec System Center roles in Symantec AntiVirus 10.x and Symantec Client Security 3.x.
Use a client uninstallation password
It is possible to configure the client component of Symantec AntiVirus to request a password before allowing a user to uninstall it. By default, this feature is enabled, but often the password is not set by an administrator. When the client can communicate with the server, the password can be reset or disabled.
To require a password before uninstalling
If the client system needs to be uninstalled but can no longer communicate with the parent server, please contact Symantec Technical Support for assistance.
Use a client network scan password
In a networked environment where most, if not all systems are running some form of antivirus software, it is inefficient to allow the systems to perform real-time or manual scanning of network resources. In such a setting, the network resources are already protected by the local antivirus system. However, it may not be desirable to completely disable this functionality as you may want to remote scan a system at a later date. The best solution is to implement a password known only to the system administrators that prevents casual scanning of network resources, while leaving it available as a useful tool. If the client system can still communicate with the parent server, the password can be reset or disabled.
To require a password before uninstalling
When you try to install windows 2003 server onto a dell laptop, it will crash during the dos setup.
This is because the Hard disk mode has the wrong type. Change the hard disk mode in the bios of the system to ATA and try again.
When booting press F12
Select BIOS
Change Hard disk mode to ATA
Reboot, and install Windows 2003 Server