Error while installing SQL Server 2005 – Native Client cannot be found

When installing from the original disc’s of Microsoft SQL, the following error occured:

“An installation package for the product Microsoft SQL Server Native
Client cannot be found. Try the installation again using a valid copy of
the installation package ‘sqlncli.msi’”

To resolve this, use the add/Remove programs to deinstall the existing SQL Server Native Client installation.

After deinstalling this package, run the setup again and the problem is fixed.

Windows Live Mesh behind Proxy

Run Netsh Commands for WINHTTP to set proxy?
http://technet.microsoft.com/en-us/library/cc731131(WS.10).aspx

  1. client Start. In the search box, type
    Command, and then right-click on Command
    Prompt
    -> Run as Administrator
  2. in the Command prompt,
  3. type netsh winhttp set proxy myproxy (where
    myproxy should be your proxy server)
    and
    Enter OR type netsh winhttp import proxy source=ie and Enter
    (if you can browser Internet using IE without issue)
  4. click Start. In the search box, type
    Services, and then click Services
  5. find “Windows Live ID Sign-in Assistant” service
    and make sure it is running
  6. if not, make sure its “Startup Type” is set to “Automatic”, and start the
    service manually by right-click -> “Start
  7. find “WinHTTP Web Proxy Auto-Discovery Service
  8. right click on it -> All Tasks -> Restart
  9. run Mesh

Ingres – Change Server Name

When changing a servername, ingres wil not function anymore. Here is a short how-to, for changing the ingres installation to the right servername.


  1. Stop the ingres service
  2. Change the name of the files to the new servername. Files are in the installation folder (c:\program files\ingres\openroad\ingres\files\nameYou can check the location with the “Ingprenv” command
  3. Change the servername with the command:ingsetenv II_GCNI2_LCL_VNODE <servername>
  4. Change the servername in the file config.dat (c:\program files\ingres\openroad\ingres\files)
  5. Start the ingres service

DSM SA Data Manager Service starting

After reboot the DSM SA Data Manager Service takes about 10 minutes to start, during this time cannot login either remote or at the console.

Answer from Dell:

Regardding the Datamanager taking too long to boot, we have found this issue when we install OMSA on a Server that has “SQL Server Integration Services” or Oracle services. Reason for the delay is the race condition which prevents command reaching the storlib. There is a race condition between the SQL integration service and DSM data manager service.

To avoid this a dependency can be created as per the below Microsoft knowledgebase. This will prevent from this condition.  

http://support.microsoft.com/kb/193888

Create a dependancÿ:

  1. Browse to the service in the register which needs to be started later. The key can be found under: HKEY_LOCAL_MACHINE\SYSTEM\CurrentControlSet\Services\<Service name>
  2. Create a new dependency:
    select the subkey representing the service you want to delay, click Edit, and then click Add Value. Create a new value name “DependOnService” (without the quotation marks) with a data type of REG_MULTI_SZ, and then click OK. When the Data dialog box appears, type the name or names of the services that you prefer to start before this service with one entry for each line, and then click OK.

    The name of the service you would enter in the Data dialog box is the exact name of the service as it appears in the registry under the Services key
Dell OMSA LiveCD 6.0.1

Dell OMSA LiveCD 6.0.1 provides the following features

• Safe environment to perform diagnostics or data recovery
• Access to disk diagnostics (Dell Online Diagnostics)
• Access to tape diagnostics (xTalk and IBM ITDT)
• DSET tool built into operating system
• Built in FTP and SMB shares to easily transfer files
• Built in telnet, SSH and VNC servers for remote troubleshooting
• Webex support for Dell technical support access
• OMSA 6.0.1 built in for local and remote access

Read the PDF: http://linux.ins.dell.com/files/openmanage-contributions/omsa-601-live/Guide.pdf

Download the iso: http://linux.dell.com/files/openmanage-contributions/?C=M;O=A

How-to install the Schemus tool

Obtaining a license key for Mail Synchronization:

  1. Select Configuration > Email Services > Platform > Tools.
  2. In the Synchronization Interface Activation area, click the Request key button.
  3. Enter your name and check the email address to receive the key.
  4. Select the checkbox according to the synchronization type you wish to use.
  5. Click OK.


Downloading the Synchronization Tool for Mail Synchronization:

  1. Select Configuration > Email Services > Platform > Tools
  2. Download the Disclosure Agreement by clicking the attached statement link.
  3. Email the Disclosure Agreement to [email protected].
    You will be sent an email containing credentials and a URL to the site from which you can download the Synchronization Tool. Before downloading the Synchronization Tool, you must request a license key (see Obtaining a license key for Mail Synchronization).


Installing the Synchronization Tool

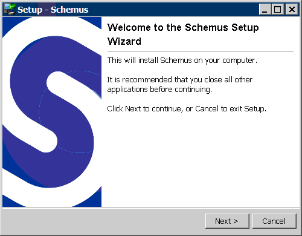
  1. Run the installer
  2. Click Next.
    In the license agreement window, read the agreement and if your company is in agreement with the conditions, click the I accept the agreement option button, and then click Next. The installation location window is displayed.
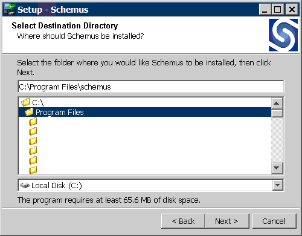
  3. Select the directory in which to install the Synchronization Tool, for example, C:\Program Files\schemus. Click Next.
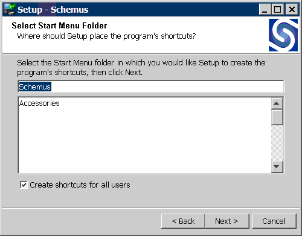
    Select where to launch Schemus from.
  4. Click Next. The installation starts.
    Once the copying of files has completed, the installer displays any release notes and change logs. The release notes contain any additional information that has been introduced since this guide was written. Additional features and bug fixes appear in this list as well as the history of changes.
  5. Click Next to move to the end of the installer
  6. Click Finish to quit the installer.