Restart HP Storageworks Storage/Management Controller
restart sc|mc a|b|both [noprompt]
sc|mc Specifies the controller to restart:
– sc: Storage Controller
– mc: Management Controller
Restart HP Storageworks Storage/Management Controller
restart sc|mc a|b|both [noprompt]
sc|mc Specifies the controller to restart:
– sc: Storage Controller
– mc: Management Controller
NTP doesn’t work on my HPE5406 switcth. It has a K15 release.
According to forum thread (link) this version has a little bug.
Work-around:
timesync sntp
sntp unicast
sntp server priority 1 192.43.244.18
ip source-interface sntp 10.91.100.1
@http://blog.petrilopia.net/info/hp-procurve-cli-cheatsheet-2/
HP ProCurve CLI CheatSheet
|
The problem occures because HP uses a 32 bit path to a file in the printer queue. The x64 client cannot resolve this location and the printer installation fails.
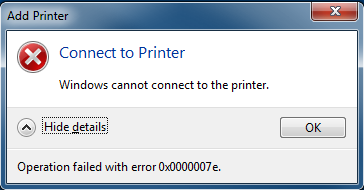
Log on to the print server. Make sure that the 64bit driver is installed on the server. Delete the BIDI key in the register:
[HKEY_LOCAL_MACHINE\SOFTWARE\Microsoft\Windows NT\CurrentVersion\Print\Printers\PRINTERNAME\CopyFiles\BIDI
The printer can be installed now without errors.
references:
http://social.technet.microsoft.com/Forums/windowsserver/en-US/6c68f4d3-fa4c-4986-9567-bbe89551652f/windows-7-windows-cannot-connect-to-the-printer-0x0000007e
http://cloudsurvivalguide.com/error-0x0000007e-adding-printer-hp-universal-print-driver/
A ‘show tech all’ file contains a lot of information from the switch. Although it is possible to capture this output using session logging in your telnet or terminal emulator application, it is better to transfer the file via TFTP. Session logs tend to have a lot of control sequences embedded which makes it difficult for us to analyze the file.
If you do not have IP connectivity on the switch and the switch has a console port, it is possible to transfer the ‘show tech all’ file via the console cable, see at the end of this document.
* You must have a TFTP server running on a PC (See ‘obtaining a TFTP server’ below)
* Your switch must have IP connectivity to the PC running a TFTP server
* You must have command line access to the switch
You can download a simple and easy to use TFTP server for free from http://www.solarwinds.com/
Alternatively you can download TFTPd32 from http://tftpd32.jounin.net/ which also includes simple SNTP, syslog and DHCP servers.
Start your TFTP server:
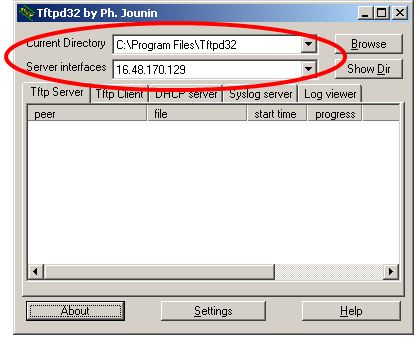
Notice the ‘Current Directory’ setting; this is where the file from the switch will end up.
Also notice the ‘Server interfaces’ setting; this is the IP address you will specify on the switch command line when creating the ‘show tech all’ file.
Connect to the command line of the switch and log in if needed. You should NOT be in configuration mode on the switch, but you do need to be in enable (manager) mode. Issue the following command:
Switch# copy command-output ‘show tech all’ tftp 12.23.34.45 xxxx.txt
Where 12.23.34.45 is the IP address of the PC running the TFTP server, and xxxx is something to identify the switch.
The switch will now generate the required file, and transfer it to your PC via TFTP. You can pick up the file in the “Current Directory” folder and e-mail it to ProCurve support.
If there is no IP connectivity to the switch, it is still possible to obtain a ‘show tech all’ file if the switch has a console port. You can use Hyper Terminal which is typically installed with Windows, or you may choose to use a free application like Tera Term (http://en.sourceforge.jp/projects/ttssh2/releases/).
Connect the serial cable between your computer and the switch. Establish a connection, the parameters are 9600,8,N,1,N (9600 baud, 8 bits, no parity, 1 stop bit, no flow control).
***NOTE*** If the above settings don’t respond and you have a newer RJ45 looking Serial port on the switch use XON/XOFF instead of NONE at the last setting (Flow Control)***
When you have command line access via the console, issue the following command:
Switch# copy command ‘sh tech all’ xmodem
Now instruct the terminal emulator application to receive the file:
Hyper Terminal – In the menu select Transfer->Receive File, Set receiving protocol to XMODEM, and note the destination directory. Click Receive, name the file, and save.
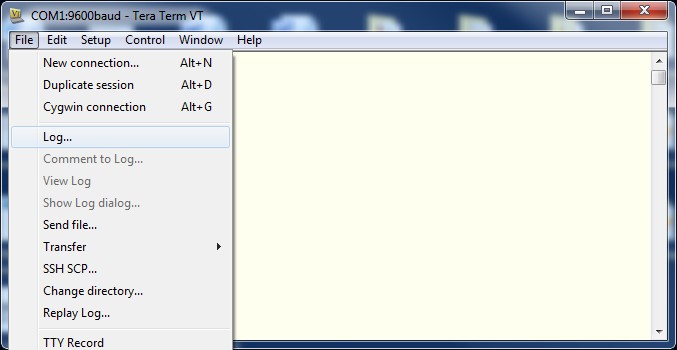
Tera Term – In the menu select File->Transfer->XMODEM->Receive, name the file, and save.
Once the file transfer has completed, you can e-mail it to HPN support.
Note that the switch may time out before you start receiving the file. Simply press Arrow Up in the terminal session, re-execute the command, and try again.
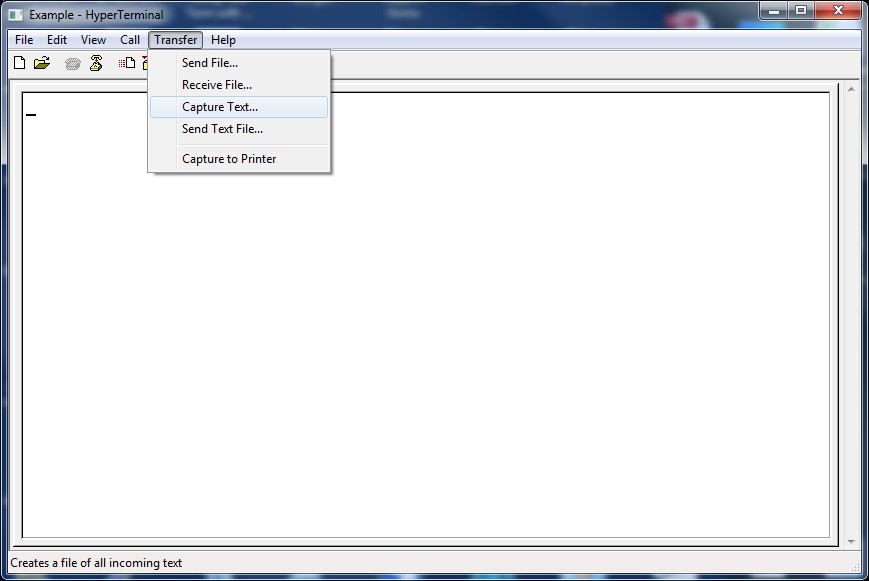
Choose Transfer -> Capture Text or the follow the examples below.
This opens a window where you can scroll down to the folder where you wish to save the logs to. In this “Browse” window you can also define a name for the log file, for instance YYYY-MM-DD-HH-MM.txt
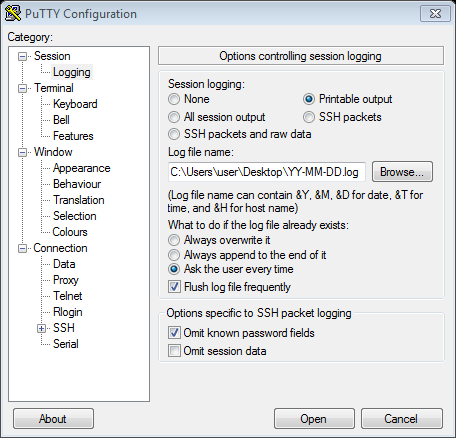
***If your preferred terminal emulator is Putty, ensure that you tick the option enabling “Printable output. ***
Choose the folder you wish to save the logs to. Your desktop is preferable.
Now your switch will send its logs to the file on your desktop, as long as it is connected via your terminal emulator.
download as word file: [wpdm_file id=83]
Monitoring Dell Servers in HP Systems Insight Manager
This post explains the details of managing Dell Servers with HP Systems Insight Manager(HPSIM) and enabling SNMP Traps support. The server MIB files “10892.mib” and “dcstorag.mib” can be used for monitoring the Dell Servers in an environment managed by HPSIM.
Managed Node Pre-Requisites
Installing the OpenManage Server Administrator
The Dell Server should be installed with the Server Administrator Software to enable the monitoring. The Server Administrator software comes with the installation DVD and the details for the installation and configuration of the OpenManage Server Administrator is available in support.dell.com manuals.
Configuring the SNMP Service
The SNMP Service needs to be configured in the Server to enable the SNMP communication between the Dell Server and HPSIM. To enable the traps to be forwarded to the HP SIM server the SNMP Trap destination needs to be configured properly with the HP SIM Server IP Address. The details for the SNMP configuration configuration is available in the Server Administrator documents in support.dell.com.
The current latest version can be downloaded from support.dell.com :
@ http://support.dell.com/support/edocs/software/svradmin/7.1/en/index.htm
Loading the Dell MIBs in HPSIM
The Dell Server MIB files are available with the Server Administrator DVD and also the MIBs can be downloaded from support.dell.com.
Uploading the MIBs is simply copying the MIBs from the downloaded folder to the \Program Files\HP\Systems Insight Manager\mibs folder
Note – As HPSIM generates an error when a MIB has a filename that contains only numbers, rename “10892.mib” to “new10892.mib”, and for consistency also rename to “dcstorag.mib” to “newdcstorag.mib”.
The MIBs needs to be compiled to generate the intermediate .cfg file which can be used to register the MIBs in HP SIM.
Register the Server MIB files as follows:
HPSIM – System Type Manager
The System Type Manager is used to define the rules to identify the different systems in HP SIM. The steps used to configure the System Type Manager to recognize a Dell Server are as follows:
Dell Windows Server


Dell Linux Server

Discovering Dell Servers
Once the Dell Server system type has been configured in the HP SIM, the Dell Servers can be properly discovered in HP SIM.
The SNMP settings can be changed as follows:


i. Once the discovery rule is saved, Click on “Run Now” option to execute the discovery Rule. The Discovered Dell Server will be shown as

ii. The “Tools and Links” tab contains the link to launch the OpenManage Sever Administrator Console for Dell Servers.

iii. The Events tab will List the associated events with the corresponding Dell Server.


The Server Administrator SNMP Traps details are documented in the Message Reference guide and can be downloaded from support.dell.com.
Appendix
MIB Files
|
# |
MIB |
MIB Filename |
Description |
| 1 | Server Administrator Instrumentation MIB | 10892.mib | The Server Administrator Instrumentation MIB provides
instrumentation data that allows you to monitor the health of a system with SNMP management applications. It provides: • Information about the status of temperatures, power supplies, voltages, currents, fans, and memory at key points in the system • Rapid access to detailed fault and performance information gathered by industry standard systems management agents • Version information for Basic Input/Output System (BIOS), firmware, and operating system • A detailed account of every cost of ownership (COO) detail about your system In addition, traps are sent to report a change in status of the health of critical components. |
| 2 | Server Administrator Storage Management MIB | dcstorag.mib | The Server Administrator Storage Management MIB provides storage management data that allows you to monitor the health of storage resources with SNMP management applications. |
If interested to know about Monitoring Dell Servers using HP Operations Manager for Windows, please refer to the Dell SPI white paper here
To get a list of HP Serial numers run the following Powershell script. Place the servernames/ipaddresses you want to check in the serverlist parameter.
#
# Get HP Serial Numbers from server text file
#
# Written by Bastiaan van Leeuwen
#
# Change $serverlist parameter to the right text file

$serverlist = "d:\script\servers.txt"
$username = Get-Credential domain\user

foreach($server in get-content $serverlist)
{
gwmi win32_systemenclosure -computer "$server" -credential $username –ErrorAction SilentlyContinue |
select __SERVER,serialnumber
}