Introduction
A ‘show tech all’ file contains a lot of information from the switch. Although it is possible to capture this output using session logging in your telnet or terminal emulator application, it is better to transfer the file via TFTP. Session logs tend to have a lot of control sequences embedded which makes it difficult for us to analyze the file.
If you do not have IP connectivity on the switch and the switch has a console port, it is possible to transfer the ‘show tech all’ file via the console cable, see at the end of this document.
Requirements
* You must have a TFTP server running on a PC (See ‘obtaining a TFTP server’ below)
* Your switch must have IP connectivity to the PC running a TFTP server
* You must have command line access to the switch
Obtaining a TFTP server
You can download a simple and easy to use TFTP server for free from http://www.solarwinds.com/
Alternatively you can download TFTPd32 from http://tftpd32.jounin.net/ which also includes simple SNTP, syslog and DHCP servers.
Obtaining the ‘show tech all’ via TFTP
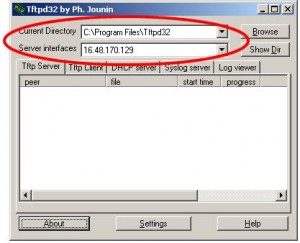
Start your TFTP server:
Notice the ‘Current Directory’ setting; this is where the file from the switch will end up.
Also notice the ‘Server interfaces’ setting; this is the IP address you will specify on the switch command line when creating the ‘show tech all’ file.
Connect to the command line of the switch and log in if needed. You should NOT be in configuration mode on the switch, but you do need to be in enable (manager) mode. Issue the following command:
Switch# copy command-output ‘show tech all’ tftp 12.23.34.45 xxxx.txt
Where 12.23.34.45 is the IP address of the PC running the TFTP server, and xxxx is something to identify the switch.
The switch will now generate the required file, and transfer it to your PC via TFTP. You can pick up the file in the “Current Directory” folder and e-mail it to ProCurve support.
Obtaining the ‘show tech all’ via console cable
If there is no IP connectivity to the switch, it is still possible to obtain a ‘show tech all’ file if the switch has a console port. You can use Hyper Terminal which is typically installed with Windows, or you may choose to use a free application like Tera Term (http://en.sourceforge.jp/projects/ttssh2/releases/).
Connect the serial cable between your computer and the switch. Establish a connection, the parameters are 9600,8,N,1,N (9600 baud, 8 bits, no parity, 1 stop bit, no flow control).
***NOTE*** If the above settings don’t respond and you have a newer RJ45 looking Serial port on the switch use XON/XOFF instead of NONE at the last setting (Flow Control)***
When you have command line access via the console, issue the following command:
Switch# copy command ‘sh tech all’ xmodem
Now instruct the terminal emulator application to receive the file:
Hyper Terminal – In the menu select Transfer->Receive File, Set receiving protocol to XMODEM, and note the destination directory. Click Receive, name the file, and save.
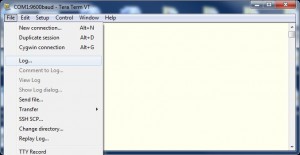
Tera Term – In the menu select File->Transfer->XMODEM->Receive, name the file, and save.
Once the file transfer has completed, you can e-mail it to HPN support.
Note that the switch may time out before you start receiving the file. Simply press Arrow Up in the terminal session, re-execute the command, and try again.
Logging the output of ‘show tech all’ via a terminal emulator:
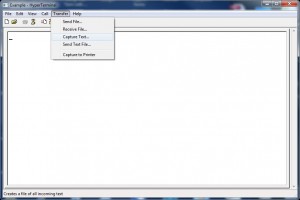
Choose Transfer -> Capture Text or the follow the examples below.
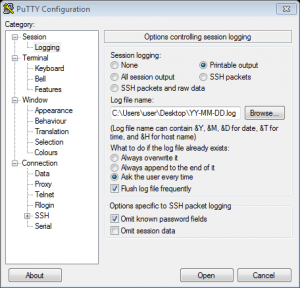
This opens a window where you can scroll down to the folder where you wish to save the logs to. In this “Browse” window you can also define a name for the log file, for instance YYYY-MM-DD-HH-MM.txt
***If your preferred terminal emulator is Putty, ensure that you tick the option enabling “Printable output. ***
Choose the folder you wish to save the logs to. Your desktop is preferable.
Now your switch will send its logs to the file on your desktop, as long as it is connected via your terminal emulator.
download as word file: [wpdm_file id=83]


