KMS Client Setup Keys

Computers that are running volume licensing editions of Windows 8, Windows Server 2012, Windows 7, Windows Server 2008 R2, Windows Vista, and Windows Server 2008 are, by default, KMS clients with no additional configuration needed.

If you are converting a computer from a KMS host, MAK, or retail edition of Windows to a KMS client, install the applicable setup key (GVLK) from the following tables

To install a client setup key, open an administrative command prompt on the client, type slmgr /ipk <setup key> and press ENTER.

Operating system edition KMS Client Setup Key
Windows 8 Professional NG4HW-VH26C-733KW-K6F98-J8CK4
Windows 8 Professional N XCVCF-2NXM9-723PB-MHCB7-2RYQQ
Windows 8 Enterprise 32JNW-9KQ84-P47T8-D8GGY-CWCK7
Windows 8 Enterprise N JMNMF-RHW7P-DMY6X-RF3DR-X2BQT
Windows Server 2012 Core BN3D2-R7TKB-3YPBD-8DRP2-27GG4
Windows Server 2012 Core N 8N2M2-HWPGY-7PGT9-HGDD8-GVGGY
Windows Server 2012 Core Single Language 2WN2H-YGCQR-KFX6K-CD6TF-84YXQ
Windows Server 2012 Core Country Specific 4K36P-JN4VD-GDC6V-KDT89-DYFKP
Windows Server 2012 Server Standard XC9B7-NBPP2-83J2H-RHMBY-92BT4
Windows Server 2012 Standard Core XC9B7-NBPP2-83J2H-RHMBY-92BT4
Windows Server 2012 MultiPoint Standard HM7DN-YVMH3-46JC3-XYTG7-CYQJJ
Windows Server 2012 MultiPoint Premium XNH6W-2V9GX-RGJ4K-Y8X6F-QGJ2G
Windows Server 2012 Datacenter 48HP8-DN98B-MYWDG-T2DCC-8W83P
Windows Server 2012 Datacenter Core 48HP8-DN98B-MYWDG-T2DCC-8W83P
Operating system edition KMS Client Setup Key
Windows 7 Professional FJ82H-XT6CR-J8D7P-XQJJ2-GPDD4
Windows 7 Professional N MRPKT-YTG23-K7D7T-X2JMM-QY7MG
Windows 7 Professional E W82YF-2Q76Y-63HXB-FGJG9-GF7QX
Windows 7 Enterprise 33PXH-7Y6KF-2VJC9-XBBR8-HVTHH
Windows 7 Enterprise N YDRBP-3D83W-TY26F-D46B2-XCKRJ
Windows 7 Enterprise E C29WB-22CC8-VJ326-GHFJW-H9DH4
Windows Server 2008 R2 Web 6TPJF-RBVHG-WBW2R-86QPH-6RTM4
Windows Server 2008 R2 HPC edition TT8MH-CG224-D3D7Q-498W2-9QCTX
Windows Server 2008 R2 Standard YC6KT-GKW9T-YTKYR-T4X34-R7VHC
Windows Server 2008 R2 Enterprise 489J6-VHDMP-X63PK-3K798-CPX3Y
Windows Server 2008 R2 Datacenter 74YFP-3QFB3-KQT8W-PMXWJ-7M648
Windows Server 2008 R2 for Itanium-based Systems GT63C-RJFQ3-4GMB6-BRFB9-CB83V
Operating system edition KMS Client Setup Key
Windows Vista Business YFKBB-PQJJV-G996G-VWGXY-2V3X8
Windows Vista Business N HMBQG-8H2RH-C77VX-27R82-VMQBT
Windows Vista Enterprise VKK3X-68KWM-X2YGT-QR4M6-4BWMV
Windows Vista Enterprise N VTC42-BM838-43QHV-84HX6-XJXKV
Windows Web Server 2008 WYR28-R7TFJ-3X2YQ-YCY4H-M249D
Windows Server 2008 Standard TM24T-X9RMF-VWXK6-X8JC9-BFGM2
Windows Server 2008 Standard without Hyper-V W7VD6-7JFBR-RX26B-YKQ3Y-6FFFJ
Windows Server 2008 Enterprise YQGMW-MPWTJ-34KDK-48M3W-X4Q6V
Windows Server 2008 Enterprise without Hyper-V 39BXF-X8Q23-P2WWT-38T2F-G3FPG
Windows Server 2008 HPC RCTX3-KWVHP-BR6TB-RB6DM-6X7HP
Windows Server 2008 Datacenter 7M67G-PC374-GR742-YH8V4-TCBY3
Windows Server 2008 Datacenter without Hyper-V 22XQ2-VRXRG-P8D42-K34TD-G3QQC
Windows Server 2008 for Itanium-Based Systems 4DWFP-JF3DJ-B7DTH-78FJB-PDRHK


source: http://technet.microsoft.com/en-us/library/jj612867.aspx
 

How to completely remove Symantec Antivirus (without entering password)

CleanWipe Utility

The cleanwipe utility is used to completely remove Symantec Antivirus and Symantec Endpoint Protection products. 
To obtain Cleanwipe please contact Symantec Technical support.

Once the utility has been obtained please follow these instructions:

This utility can be run on Windows 2000, Windows XP (32 and 64 bit), and Windows Server 2003 (32 and 64 bit.)

Warnings:
Do not run this utility on Windows NT, Windows 9x, or Windows Me.
Do not run this utility on systems that have Symantec AntiVirus 8.x or below installed.

You cannot select individual applications to remove. 

CleanWipe may remove LiveUpdate.

CleanWipe will remove Virus Definitions if you select Yes to "Do you want to do a detailed MSI Product Code registry search?...", even when selecting No to "If Virus Defs remain after uninstalling Symantec products do you want to uninstall the Virus Defs?". If you have other Symantec applications that use the VirusDefs folder, it is recommended that you make backup copy of the VirusDefs folder before running the CleanWipe tool. The VirusDefs folder is located under C:\Program Files\Common Files\Symantec Shared\

When using the CleanWipe utility, please be aware that it removes the following products and components from the computer:

Alert Management Server
Firewall Administrator
Quarantine Console
Quarantine Server
Symantec AntiVirus (Version 9.x and above)
Symantec AntiVirus Corporate Edition
Symantec Client
Symantec Client Firewall
Symantec Client Security
Symantec Endpoint Protection
Symantec Endpoint Protection Manager
Symantec LiveUpdate
Symantec Network Access Control
Symantec Sygate Enterprise Protection
Symantec System Center
Symevent

If you have other Symantec applications on the computer that depend on any of the applications listed above, those applications may not function properly. The customer may need to re-install the missing applications after running CleanWipe.

Note: The zip file is password protected.
Un-Zip Password: symantec

1. Extract the file to a new folder in a convenient location, such as the Desktop, using the un-zip password provided above.
2. Browse to the new folder and execute the utility by double clicking 'CleanWipe.exe'
3. Follow the on-screen instructions.

The utility runs in verbose mode and will ask you about the components you want uninstalled.

Note: If the CleanWipe utility fails to remove Symantec Endpoint Protection, please proceed through the manual uninstall procedure for the version of the product you have installed.

You can find the manual uninstall instructions in the following document: 

Title: How to manually uninstall Symantec Endpoint Protection client from Windows 2000, XP and 2003, 32-bit Editions
Solution ID: 2007073018014248
Document URL:
http://service1.symantec.com/SUPPORT/ent-security.nsf/docid/2007073018014248

Title: 'Manual uninstallation documents for Symantec Client Security products'
Solution ID: 2002031914291648
Document URL: http://service1.symantec.com/SUPPORT/ent-security.nsf/docid/2002031914291648

[wpdm_file id=77]

SQL Server 2008 R2 – Unattended Silent Install

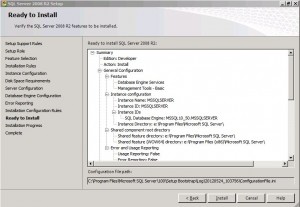
To create an Unattended Silent Install, you first need a configuration file with all the right settings in it. To create the file, run a installation of SQL and select all required settings. Continue the installation until you reach the “Ready To Install” step. In this step you will see the location of the configuration file (see the image below).


In this case it is: C:\program files\microsoft sql server\100\setup bootstrap\log\20120524_103756\configurationfile.ini

You can cancel the setup proces now.


Edit the configuration file as follows:


  • Set QUIET to “True”. This specifies that Setup will run in a quiet mode without any user interface (i.e. unattended installation)QUIET=”True”
  • Add IACCEPTSQLSERVERLICENSETERMS and set its value to “True”. This is to required to acknowledge acceptance of the license terms when the /Q (i.e. QUIET) parameter is specified for unattended installations.ACCEPTSQLSERVERLICENSETERMS=”True”
  • Remove the UIMODE parameter as it can’t be used with the QUITE parameter.
  • IF used SQL as the Securitymode, use SAPWD to set a password for the SA account
    SAPWD=”a complex password”
  • Set TCPENABLED to yes if you want external connections to you SQL instance
    TCPENABLED=”1″


Now you have your configuration file ready run SQL with the following command:

“<path to SQL setup folder>\setup.exe” /ConfigurationFile=”<path to config file>”

View BSOD (blue screen) crash information stored in dump files

Description

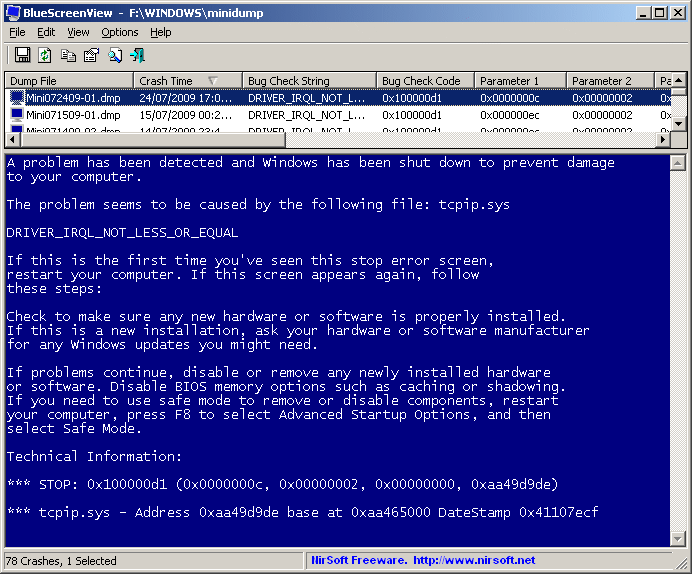
BlueScreenView scans all your minidump files created during ‘blue screen of death’ crashes, and displays the information about all crashes in one table. For each crash, BlueScreenView displays the minidump filename, the date/time of the crash, the basic crash information displayed in the blue screen (Bug Check Code and 4 parameters), and the details of the driver or module that possibly caused the crash (filename, product name, file description, and file version).
For each crash displayed in the upper pane, you can view the details of the device drivers loaded during the crash in the lower pane. BlueScreenView also mark the drivers that their addresses found in the crash stack, so you can easily locate the suspected drivers that possibly caused the crash.

http://www.nirsoft.net/utils/blue_screen_view.html

[wpdm_file id=76]

How to Set or Change a Dell PowerEdge Service Tag

Source: http://lonesysadmin.net/2011/03/08/how-to-set-a-dell-poweredge-service-tag/


Got a Dell PowerEdge that you replaced the motherboard on, and now it doesn’t have a service tag? Reset it with the asset.com tool, which I’ve conveniently packaged as both a floppy disk image and an ISO for those of us in need. They both use the Windows 7 boot disk DOS and asset_A209.com from ftp.dell.com (renamed to asset.com).

[wpdm_file id=50]

[wpdm_file id=51]

Once you boot from these you can set the service tag with:

asset /s <service tag>

You can also set the asset tag with:

asset <asset tag>

Or clear the asset tag with:

asset /d

Changing the default SQL Server backup folder

When installing SQL, you can change the default SQL Server backup folder. When you want to change this afterwards you can’t do this through a gui.


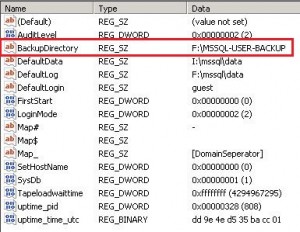
If you want to change the path open REGEDIT and navigat to the following key (or similar for your instance or SQL version:

HKEY_LOCAL_MACHINE\SOFTWARE\Microsoft\Microsoft SQL Server\MSSQL10.50.MSSQLSERVER\MSSQLServer

Change the BackupDirectory key to the desired path.

This default path will be used when backing up a database.

TDP for backups fail with rc = 612

The TDP for backups fail with the following error:

ACN5705W An error was encountered with Tivoli Storage Manager API initialization, rc = 612.

The TSM API’s message file dscenu.txt may have become corrupted, or is at the wrong version. Check dscenu.txt in program files\tivoli\tsm\baclient against the dscenu.txt file in program files\tivoli\tsm\api – if the versions and last-modified dates do not match, then this technote probably applies.

Make a copy of dscenu.txt from the baclient directory to the API directory, and test again.